目次
概要
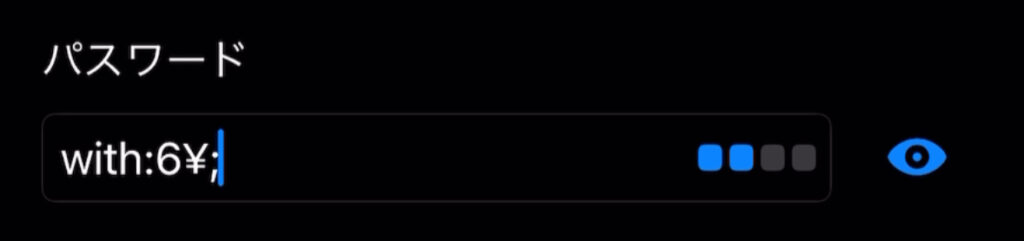
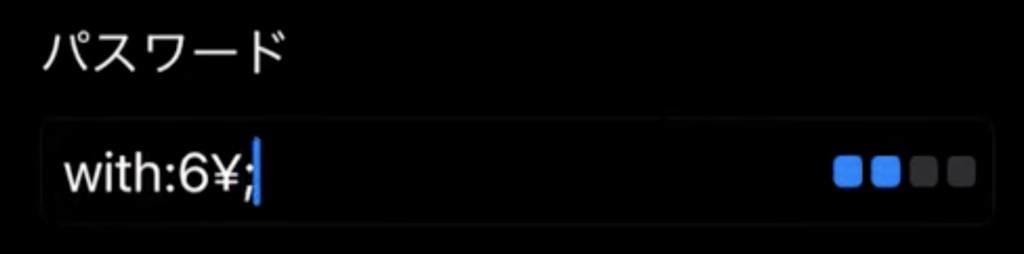
基礎編では以下の画像のように、TextFieldの右端に少しタイルが表示されるような感じだった。
しかし、どうせなら「メッセージを添える」とか、「パスワード強度に応じて色を変える」とか、「メーターのように表示する」という方がおしゃれだ。
今回はライブラリ内のソースコードを元に以下のことを実装してみよう
- パスワード強度をメーター形式で表現する
- パスワード強度に応じてメーターの色を変える
- パスワード強度に応じて表示する文字列を変える
ソースコード
import SwiftUI

@main
struct TestApp: App {
    @UIApplicationDelegateAdaptor(AppDelegate.self) var appDelegate

    var body: some Scene {
        WindowGroup {
            SecurityPasswordView()
        }
    }
}
import SwiftUI
import Zxcvbn

struct SecurityPasswordView: View {
    @State var password: String = ""
    @State private var isBlankPassword: Bool = true
    @State private var securityMessage: String = "パスワード強度:無"
    @State private var meterColor: Color = .red

    private let passwordPlaceholder: String = "パスワード"

    var body: some View {
        ZStack {
            if #available(iOS 17.0, *) {
                passwordView()
                    .onChange(of: password) { _, password in
                        passwordStrengthConfigure(password: password)
                    }
            } else {
                passwordView()
                    .onChange(of: password) { password in
                        passwordStrengthConfigure(password: password)
                    }
            }
        }
    }

    private func passwordStrengthConfigure(password: String) {
        switch password.zxcvbn(custom: []).score {
        case .none:
            securityMessage = "パスワード強度:無"
            meterColor = .red
        case .insufficient:
            securityMessage = "パスワード強度:かなり弱い"
            meterColor = .red
        case .weak:
            securityMessage = "パスワード強度:弱い"
            meterColor = .orange
        case .sufficient:
            securityMessage = "パスワード強度:普通"
            meterColor = .green
        case .strong:
            securityMessage = "パスワード強度:強い"
            meterColor = .blue
        }
    }

    private func passwordView() -> some View {
        return VStack(alignment: .leading) {
            Text("パスワード")
            HStack {
                if isBlankPassword {
                    SecureField(passwordPlaceholder, text: $password)
                        .textFieldStyle(.roundedBorder)
                        .keyboardType(.asciiCapable)
                } else {
                    TextField(passwordPlaceholder, text: $password)
                        .textFieldStyle(.roundedBorder)
                        .keyboardType(.asciiCapable)
                }
                Toggle(isOn: $isBlankPassword) {
                    Image(systemName: isBlankPassword ? "eye.slash.fill" : "eye.fill")
                }
                .toggleStyle(.button)
            }
            HStack {
                ForEach(Result.Score.allCases) { score in
                    if score > .none {
                        Rectangle()
                            .foregroundColor(password.zxcvbn(custom: []).score < score ? Color.secondary.opacity(0.4) : meterColor)
                            .frame(height: 10)
                    }
                }
            }
            Text(securityMessage)
        }
        .padding()
    }
}
デモ動画
詳細
注目すべきはResultViewの中身を見てみよう。
初期化時に以下のようなコードが書かれている。
import SwiftUI

public struct ResultView: View {
    let result: Result

    public init(_ string: String = "", custom: [String] = []) {
        result = string.zxcvbn(custom: custom)
    }

// ~ 以下略 ~
zxcvbnメソッドを使用するとResultという型のオブジェクトを取得できる。
では、次はそのResultの中身を見てみよう。
import Foundation

public struct Result {
    public enum Score: Int, CaseIterable, Comparable, Identifiable {
        case none = 0
        case insufficient = 1
        case weak = 2
        case sufficient = 3
        case strong = 4

        init(_ crackTime: TimeInterval) {
            if crackTime < pow(10.0, 2.0) {
                self = .none
            } else if crackTime < pow(10.0, 4.0) {
                self = .insufficient
            } else if crackTime < pow(10.0, 6.0) {
                self = .weak
            } else if crackTime < pow(10.0, 8.0) {
                self = .sufficient
            } else {
                self = .strong
            }
        }

// ~ 中略 ~

    }

    public let string: String
    public let matches: [Match]
    public let entropy: Double
    public let calculationTime: TimeInterval
    public let crackTime: TimeInterval
    public let score: Score

    init(string: String, matching: [Matching] = []) {

// ~ 以下略 ~
つまり、zxcvbnメソッドを使用した結果、パスワード強度の情報がscoreに入っていることがわかる。そう、これを使用すれば、score、つまりパスワード強度に応じて画面の表示を変えることができる。
では、順番に見ていこう。
パスワードの強度を取得する
今回の肝はなんと言ってもここだ。
先ほど、「zxcvbnメソッドを使用すればResultオブジェクトを取得できる」と書いた。
そして、そのResultオブジェクトにはscoreというプロパティが含まれている。このスコアがパスワード強度になっているのだ。
なので、パスワード強度を取り出す時には以下のように書いてやればいい。
// passwordはString型で入力したパスワードの文字列を格納
password.zxcvbn(custom: []).score
ちなみに、列挙体Scoreは以下のようになっている。
public enum Score: Int, CaseIterable, Comparable, Identifiable {
    case none = 0
    case insufficient = 1
    case weak = 2
    case sufficient = 3
    case strong = 4

    // ~ 中略 ~

}
そして、scoreのプロパティは列挙体の名前から0ほどパスワード強度が弱くなっている。
メーター形式で表示してみよう
今度はUIの部分だ。
現状では以下のように青のタイル状になっている。
可能なら、パスワード強度によって色を変化させたり、メッセージを変えたい。
というか、メーター状にしてもっと見やすくしたい。
そのためにはライブラリのメーター部分を参考に自分でUIを実装すればいい。
まず、ライブラリ内は以下のようになっている。つまり、タイル状の表示だ。
import SwiftUI

public struct ResultView: View {
    let result: Result

    // ~ 中略 ~

    public var body: some View {
        HStack(spacing: length * 0.33) {
            ForEach(Result.Score.allCases) { score in
                if score > .none {
                    RoundedRectangle(cornerRadius: length * 0.25)
                        .foregroundColor(result.score < score ? Color.secondary.opacity(0.4) : .accentColor)
                        .frame(width: length, height: length * 1.1)
                }
            }
        }
        .padding(.horizontal, length * 0.66)
    }
}

// ~ 以下略 ~
順番に見ていこう。
まず、Result.Score.allCasesで先ほどのパスワード強度のレベルを表している。
レベルは0~4まであったため、単純に、5回RoundedRectangleを表示する、つまり四角形を表示している処理をしている。(if文でnoneよりもレベルが高い場合に描画となっているので、表示される四角形は4つだが。)
そして、タイル状になっているのはRoundedRectangleのframeの部分、そして角丸になっているのは(cornerRadius: length * 0.25)の部分。なので、今回は以下のように実装してしまえばメーターのようになる。
HStack {
    ForEach(Result.Score.allCases) { score in
        if score > .none {
            Rectangle()
                .foregroundColor(password.zxcvbn(custom: []).score < score ? Color.secondary.opacity(0.4) : meterColor)
                .frame(height: 10)
            }
        }
    }
}
パスワード強度に応じて色と文言を変えてみよう
今度は色を変更する。
これはRectangleのforegroundColorを設定する。
「password.zxcvbn(custom: []).score < score」の条件次第で色をつけるかどうかを設定している。
.foregroundColor(password.zxcvbn(custom: []).score < score ? Color.secondary.opacity(0.4) : meterColor)そして、meterColorは色を格納している変数なのだが、それは以下のようになっている。
メーターの下に表示しているメッセージも同様。
そして、パスワード強度のレベルが変わった時に色やメッセージが変わるようにchangeの設定をしている。
passwordView()
    .onChange(of: password) { _, password in
        passwordStrengthConfigure(password: password)
    }
private func passwordStrengthConfigure(password: String) {
switch password.zxcvbn(custom: []).score {
case .none:
securityMessage = "パスワード強度:無"
meterColor = .red
case .insufficient:
securityMessage = "パスワード強度:かなり弱い"
meterColor = .red
case .weak:
securityMessage = "パスワード強度:弱い"
meterColor = .orange
case .sufficient:
securityMessage = "パスワード強度:普通"
meterColor = .green
case .strong:
securityMessage = "パスワード強度:強い"
meterColor = .blue
}
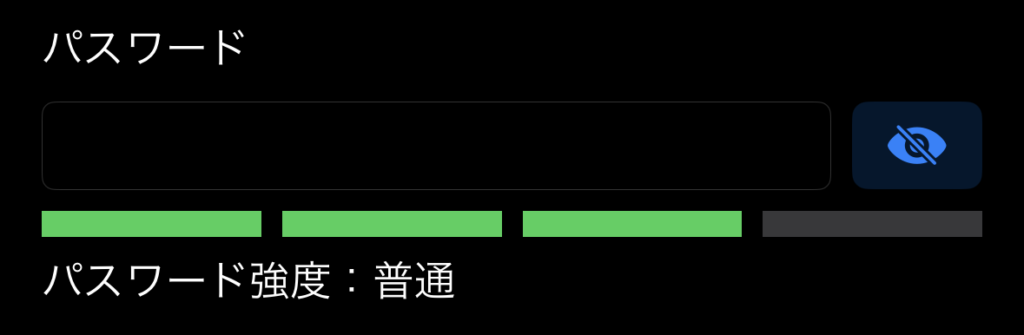
}まとめると以下の対応をした。
- RoundedRectangleではなく、Rectangleを使用する。
- foregroundColorをpassword.zxcvbn(custom: []).scoreに応じてmeterColorが変化するように設定しておく
- heightのみ10で設定することで、幅はUIの横幅まで、高さは10という横長の長方形の描画にする
そうすることで、以下のようなUIの出来上がりだ。