
目次
概要
LINEの友達一覧など、リストにして一列に表示したい時がある。
そんな時はListViewを使うことで実装できる。
ソースコード
ファイル構成は以下のようになっている。
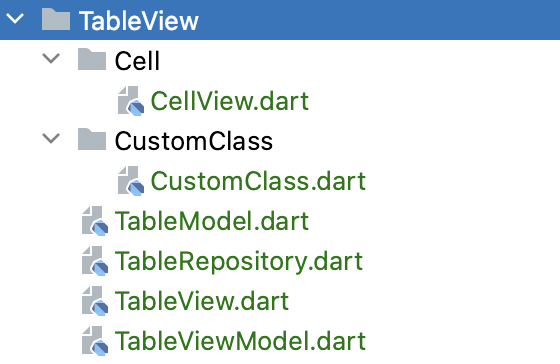
補助クラス
import 'package:flutter/material.dart';
import 'package:flutter/widgets.dart';
import '../CustomClass/CustomClass.dart';

class CellView extends StatelessWidget {

  late CustomClass _customData;

  CellView(CustomClass customData) {
    this._customData = customData;
  }

  @override
  Widget build(BuildContext context) {
    return Container(
        child: GestureDetector(
            child:Container(
                padding: EdgeInsets.all(8.0),
                decoration: new BoxDecoration(
                    border: new Border(bottom: BorderSide(width: 1.0, color: Colors.grey))
                ),
                child: Row(
                  mainAxisAlignment: MainAxisAlignment.spaceBetween,
                  children: [
                    basicCellView(),
                    IconButton(
                      icon: Icon(Icons.settings),
                      onPressed: () => {

                      },
                    )
                  ],
                )
            ),
            onTap: () {
              // 画面遷移処理とか
            }
        )
    );
  }

  Widget basicCellView() {
    return Row(
      children: [
        Container(
          margin: EdgeInsets.all(10.0),
          child: Container(
              width: 100,
              height: 100,
              decoration: BoxDecoration(
                  image: DecorationImage(
                    image: _customData.image!,
                    fit: BoxFit.contain,
                  )
              )
          ),
        ),
        Text(
          _customData.name,
          style: TextStyle(
              color:Colors.black,
              fontSize: 18.0
          ),
        ),
      ]
    );
  }
}
import 'package:flutter/material.dart';
class CustomClass {
int id = -1;
AssetImage? image;
String name = "";
CustomClass(int id, String name, AssetImage image) {
this.id = id;
this.name = name;
this.image = image;
}
}画面のファイル
import 'package:flutter_riverpod/flutter_riverpod.dart';

final tableModelProvider = Provider((ref) => TableModel());

class TableModel {

}
import 'package:flutter_riverpod/flutter_riverpod.dart';
import 'TableModel.dart';
final tableRepositoryProvider = Provider((ref) => TableRepositoryImpl(model: ref.read(tableModelProvider)));
abstract class TableRepository {
}
class TableRepositoryImpl implements TableRepository {
TableRepositoryImpl({required TableModel model}): _model = model;
final TableModel _model;
}import 'package:concentration/TableView/Cell/CellView.dart';
import 'package:flutter/material.dart';
import 'package:flutter_riverpod/flutter_riverpod.dart';
import 'TableViewModel.dart';
class TableView extends ConsumerWidget {
TableView({Key? key}) : super(key: key);
TableViewModel _viewModel = TableViewModel();
@override
Widget build(BuildContext context, WidgetRef ref) {
return Scaffold(
appBar: AppBar(
backgroundColor: Theme.of(context).colorScheme.inversePrimary,
title: Text("TableViewを作ろう"),
),
body: ListView(
children: [
for(var data in _viewModel.listData)
InkWell(
onTap: () {
},
child: CellView(data),
),
]
)
);
}
}import 'package:flutter/widgets.dart';
import 'package:flutter_riverpod/flutter_riverpod.dart';
import 'TableRepository.dart';
import 'CustomClass/CustomClass.dart';
final chatViewModelProvider = ChangeNotifierProvider((ref) => TableViewModel(repository: ref.read(tableRepositoryProvider)));
class TableViewModel extends ChangeNotifier {
TableRepository? repository;
List<CustomClass> listData = [];
TableViewModel({this.repository}) {
createList();
}
void createList() {
this.listData = [
CustomClass(1, "トリニトロトルエン", AssetImage("images/img_01.png")),
CustomClass(2, "Flutter", AssetImage("images/img_02.png")),
CustomClass(3, "Swift", AssetImage("images/img_03.png")),
CustomClass(4, "C Sharp", AssetImage("images/img_04.png")),
CustomClass(5, "マロ", AssetImage("images/club_1.png")),
CustomClass(6, "クッパ", AssetImage("images/dia_1.png")),
CustomClass(7, "ピーチ", AssetImage("images/heart_1.png")),
CustomClass(8, "ジーノ", AssetImage("images/logo_s.png")),
CustomClass(9, "マリオ", AssetImage("images/spade_1.png")),
CustomClass(10, "夜叉姫", AssetImage("images/yashahime.jpg")),
];
}
}アプリ実行部分
import 'package:flutter/material.dart';
import 'package:flutter_riverpod/flutter_riverpod.dart';

import 'TableView/TableView.dart';

void main() async{

  runApp(ProviderScope(child: MyApp()));
}

class MyApp extends StatelessWidget {
  const MyApp({super.key});

  @override
  Widget build(BuildContext context) {
    return MaterialApp(
      title: 'Flutter Demo',
      theme: ThemeData(
        colorScheme: ColorScheme.fromSeed(seedColor: Colors.deepOrange),
        useMaterial3: true,
      ),
      home: TableView(),
    );
  }
}
デモ動画
詳細
実務レベルのことも考えて、以下の構成にしている。
- ViewModelクラスでAPIを使用してデータの管理をできるような構成にする(今回はハードコーディング)
- セルのデータのカスタムクラスを使用
- セルのビューは別クラスで作成
- セルをタップした時はエフェクトをつける
- セルの右端に設定用のボタンを設置する
そして、ListViewの実装の核となる部分はこちら
body: ListView(
    children: [
        for(var data in _viewModel.listData)
            InkWell(
                onTap: () {
            },
            child: CellView(data),
        ),
    ]
)
ListViewを定義して、childrenの要素に並べたViewがそのままリストとして表示される。
また、ListViewのセルをタップした時のエフェクトをつけるために、InkWellを使用している。
InkWellのonTapの中に画面遷移などの処理を記載すれば、詳細画面へ遷移するといったこともできる。
そして、CellViewクラスの中にTableViewModelのlistDataに格納されているデータを元に画像や名前を表示している。